WWT Shows CLICK TO: Join and Support Internet Horology Club 185™ IHC185™ Forums

• Check Out Our... •
• TWO Book Offer! •
Go
New Topic
Find-Or-Search
Notify
Tools
Reply to Post
  
How to Spend Sunday - Keystone Case Restoration/Detailing "Click" to Login or Register
 
IHC Member 1541
Picture of Lorne Wasylishen
posted
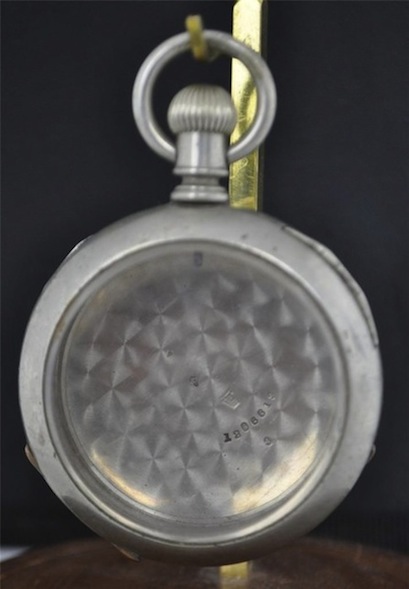
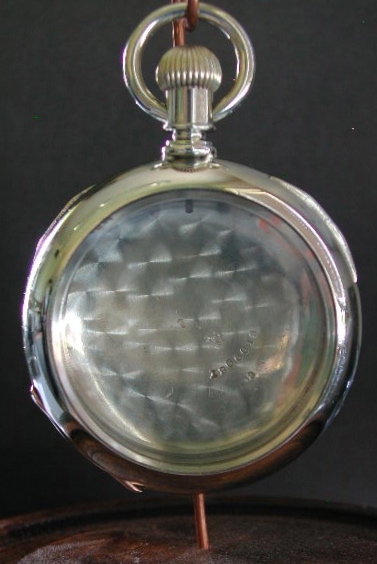
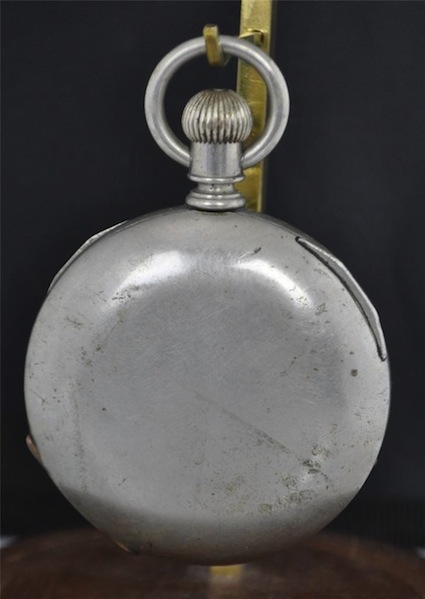
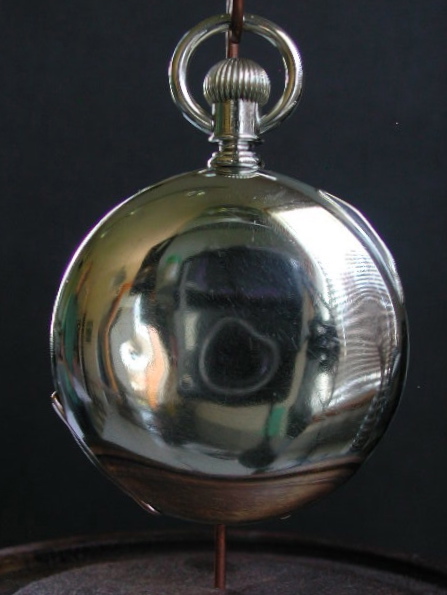
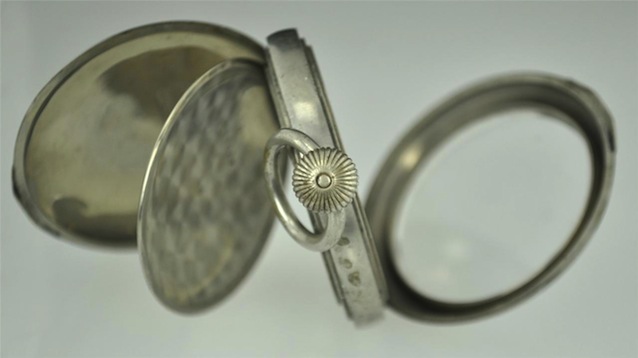
I have become enamoured of these earflap cases. The first one I bought was already shined up, then this one came along and I am working on buying a third one.

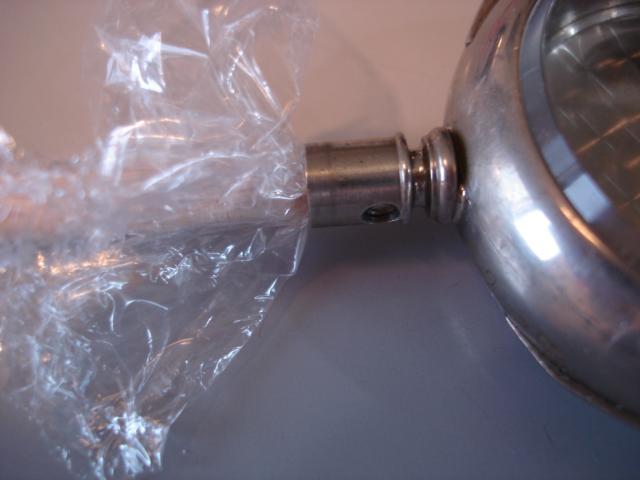
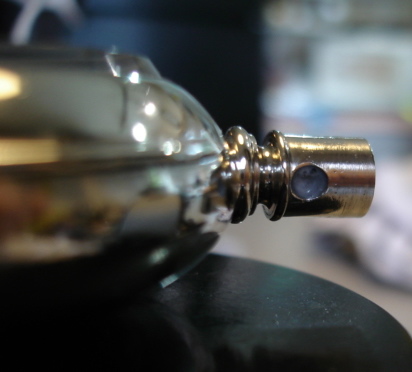
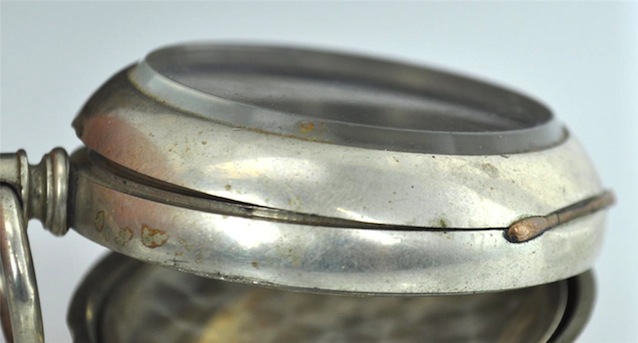
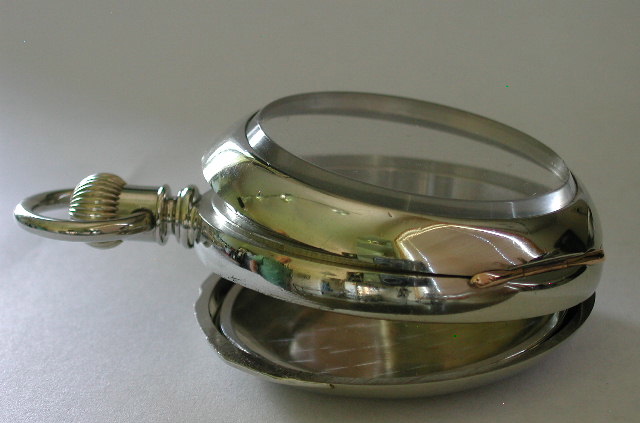
The only real issue was that the concave bow receptacles were worn through so I decided to try metal epoxy. I had to provide a dam to keep the epoxy from being pushed into the pendant where it would block the sleeve from going back in.

I just put a dowel in the drill press and sanded it down to a point where I could put some saran wrap around it and stick it in the hole without tearing it. This epoxy sticks to both wood and plastic so I figured after it was set I could just pull out the wood then pick the saran out with tweezers. Turned out the wood and saran came out together slick as I wanted.

 
Posts: 2093 | Location: British Columbia in Canada | Registered: March 02, 2011
IHC Member 1541
Picture of Lorne Wasylishen
posted
Set up epoxy.

 
Posts: 2093 | Location: British Columbia in Canada | Registered: March 02, 2011
IHC Member 1541
Picture of Lorne Wasylishen
posted
Case front before.

 
Posts: 2093 | Location: British Columbia in Canada | Registered: March 02, 2011
IHC Member 1541
Picture of Lorne Wasylishen
posted
And after, original crystal.

 
Posts: 2093 | Location: British Columbia in Canada | Registered: March 02, 2011
IHC Member 1541
Picture of Lorne Wasylishen
posted
Case back before.

 
Posts: 2093 | Location: British Columbia in Canada | Registered: March 02, 2011
IHC Member 1541
Picture of Lorne Wasylishen
posted
Case back after.

 
Posts: 2093 | Location: British Columbia in Canada | Registered: March 02, 2011
IHC Member 1541
Picture of Lorne Wasylishen
posted
Side view before.

 
Posts: 2093 | Location: British Columbia in Canada | Registered: March 02, 2011
IHC Member 1541
Picture of Lorne Wasylishen
posted
Side view after.

Note the once floppy bow now holds it's position. I don't know if the epoxy will wear down but for now it seems to work fine.

 
Posts: 2093 | Location: British Columbia in Canada | Registered: March 02, 2011
IHC Member 1541
Picture of Lorne Wasylishen
posted
Top view before.

 
Posts: 2093 | Location: British Columbia in Canada | Registered: March 02, 2011
IHC Member 1541
Picture of Lorne Wasylishen
posted
Top view after.

 
Posts: 2093 | Location: British Columbia in Canada | Registered: March 02, 2011


posted
Nice work - Lorne
 
Posts: 7178 | Location: Illinois in the USA | Registered: November 11, 2011
IHC Member 1541
Picture of Lorne Wasylishen
posted
Thanks Jon. There was still some of the "bottom of the bowl" to help support the epoxy so this case seemed a good one to try. I have been wanting to see if this would work for some time now.

I will now try a case with the bow holes completely gone.

By the way, the Waltham hand arrived safe and sound. I expected to have a pic posted by now but the watch itself needed work so I'm just waiting for a call from my watch guy.
 
Posts: 2093 | Location: British Columbia in Canada | Registered: March 02, 2011
Picture of Dave Turner
posted
Very well done. This is a big part of what I like about old watches. Bringing them back to life.


Dave Turner
 
Posts: 1978 | Location: Wilson, North Carolina in the USA | Registered: November 15, 2011
posted
I like these cases too , very nice job
 
Posts: 1574 | Location: Maryland in the USA | Registered: June 04, 2015
Life Member
posted
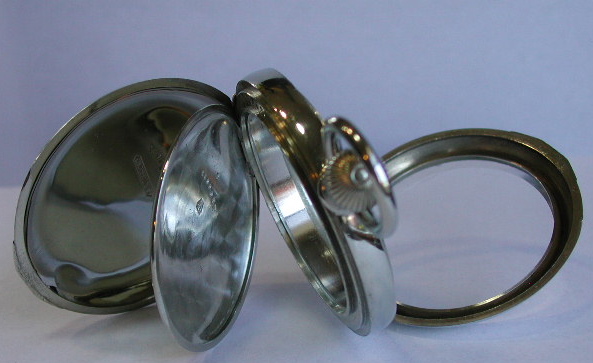
I just happened to see this thread. Very nice job on that case. And I like the way the epoxy worked out for repairing the bow detents.

A few years ago, my brother asked me to clean an Elgin pocket watch he had acquired in trade for a bicycle. I wish I had taken photos of it. Someone had repaired the detents for the bow by filling them with what appeared to be bushings made from a stainless steel screw. It looked like they had reamed the hole all the way through, then run in a couple of short screws and ground them off flush inside and out, then polished the outside flush with the original case. The inside was left a little rough, but that of course did not show. I was pretty impressed with their skill as a machinist. Fortunately, I didn't have to screw in the sleeve any further than it was. I wouldn't want to have to try to cut new threads through those two bushings. :-)
 
Posts: 213 | Location: Westminster, Maryland in the USA | Registered: March 02, 2015
  Powered by Social Strata  


©2002-2023 Internet Horology Club 185™ - Lindell V. Riddle President - All Rights Reserved Worldwide

Internet Horology Club 185™ is the "Family-Friendly" place for Watch and Clock Collectors