
| WWT Shows | CLICK TO: Join and Support Internet Horology Club 185™ | IHC185™ Forums |

|
• Check Out Our... • • TWO Book Offer! • |
Welcome Aboard IHC185™  Internet Horology Club 185
  IHC185™ Discussion Site Main Page
  Horological Discussions, Questions and Answers
  European Pocket Watch Forum
  Help Id my Great Great Grandmothers watch-Swiss?
 Internet Horology Club 185
  IHC185™ Discussion Site Main Page
  Horological Discussions, Questions and Answers
  European Pocket Watch Forum
  Help Id my Great Great Grandmothers watch-Swiss?
Go  | New Topic  | Find-Or-Search  | Notify  | Tools  | Reply to Post  |  |
The chain was originally broken in three places so Jerry made a chain and added a Fob for my Grandfathers watch. | ||||
|
| IHC Life Member |
Ernie sent me two chains; One was his G Grandmother's and one was an extra chain that he had. I was able to determine that his G Grandmother's chain was in fact Silver, the other one was not so we decided not to pursue that one any further. However his G Grandmother's was long enough to make two chains of nice length and even though it was broken into four pieces it worked out nicely as you can see from the photos. Here are the two chains that was put together from Ernie's G Grandmother's chain. One was for her watch and the other is for Ernie's Grandfather's watch....maybe Ernie can post some photos of both watches with the chains attached soon.... Regards, Jerry This is G Grandmother's Chain 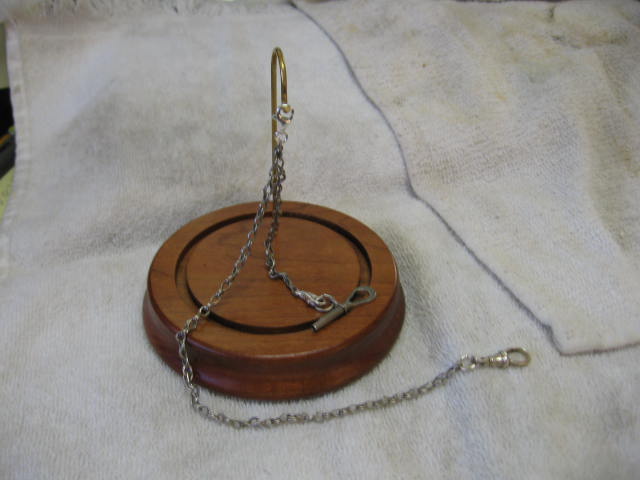 | |||
|
| IHC Life Member |
I see that Ernie posted one with his Grandfather's watch attached....looks great Ernie... here is the other photo I was attaching Grandfather chain.... 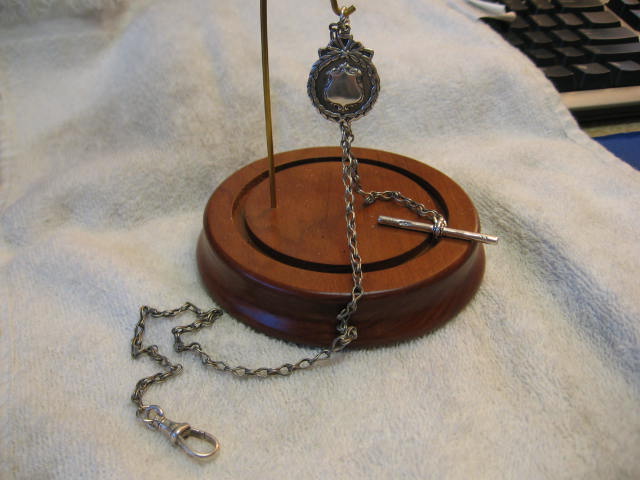 | |||
|
Long overdue updating this topic, so I'll make a start on it with the case. Ernie sent me the watch a while back to see if anything could be done with it.......... The movement has turned into something between a lifetime ambition to revive it, and sheer dogged determination not to let it beat me .......... but enough of that later! First up on the case was the state of pendant and bow! The bow should have had drilled and tapped ends, so that a screw would pass straight through It and the pendant to prevent the pusher from falling out. At some point though, the wear was so great in the holes in the side of the pendant, someone had filled the whole shebang with solder, and shoved on a 'clamp' type bow ....... Doubtless the old bow and screw was so worn it fell off. The first shots are of the plugs of solder in the pendant! John 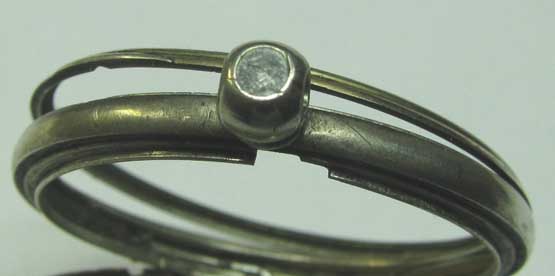 | ||||
|
Shot below is the solder plug from inside the case. The back dome opening spring buried inside the band had to be removed first so I could get at it. Not an easy job either, as the very small head of the screw retaining it was well chewed up - and the only way out it could come, was the way it went in! Being 'soft solder' I tried heating the pendant first to melt the stuff out, but it was clear that too much heat would be needed, and I 'bottled out' ........ quite worried about melting something else. Abandoning that idea, then went the hard way by drilling the bulk of it first, then using fine burrs in a flexible drive to clean out the hole. It had to take a replacement pusher, which I took from a spare case I had here - ditto the replacement bow. What made the job harder, was that the solder was actually surrounding a tube of brass between the holes where the bow retaining screw would have passed through - and why the stuff wouldn't melt! It also meant the tube kept grabbing whatever I used to chew out the solder, with the danger of breaking off the pendant from the case band. John 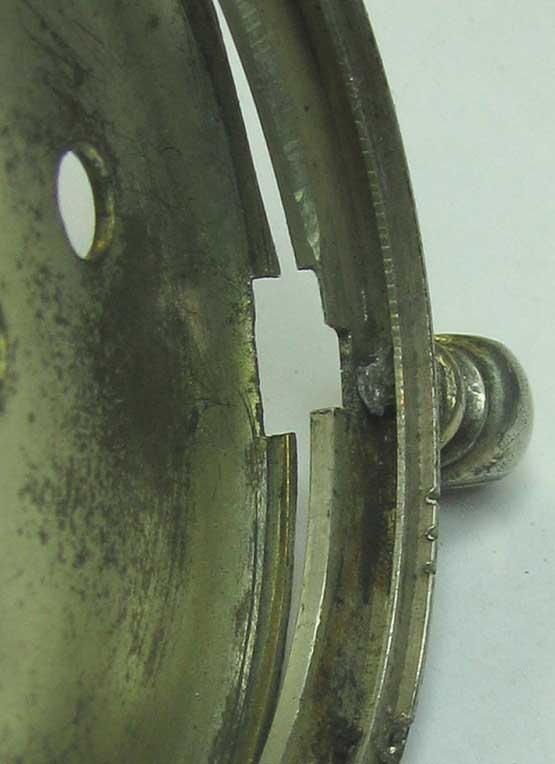 | ||||
|
When I finally cleaned up the pendant and got the replacement bow and pusher to fit and work, the next task was to clean it up and see what was under all the muck! Weeeeeelll, Big Surprise ..... turns out the rim of the back and bezel were actually Gold plated, but not enough of it was left to determine exactly which Kt Gold it was. Chewing it over with Ernie, my thoughts were to trial some 9Kt & 18Kt plating, and see which matched best. There was a thought that it might look better left as was, but really it was far too scruffy for that, and had to be either re-done or removed totally if it wasn't to look shabby. I suggested in the end, that I'd match the original plate as close as I could, but just enough to highlight what was there. Essentially, not to look 'New' but not to look worn either. Anyway, first shot is of the replacement pusher, bow and cleaned up case band etc! John 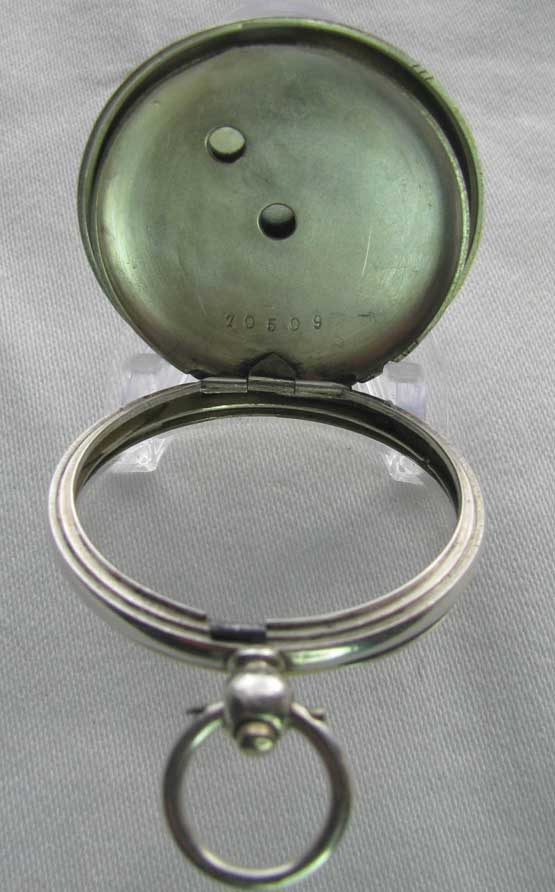 | ||||
|
I've got a fairly expensive plating rig, that also powers a plating pen. This uses replaceable hard felt type tips which can be shaped fairly easily - good for this type job, because the tips can be shaved quite thin. The tips are soaked in the plating fluid for about an hour before use, so that they're well loaded with precious metal and the cyanide based electrolyte. 9K Gold didn't look right, but 18K did, so that's what was used. Touching in the rims was quite a lengthy job too, as the Gold had to go on the rims, but not into the creases of the rolled edges, plus with a pen, you only work the immediate area under the tip, which meant a steady continuaous travel around the rims, then repeated until the plate was even. Came out rather well I think! John 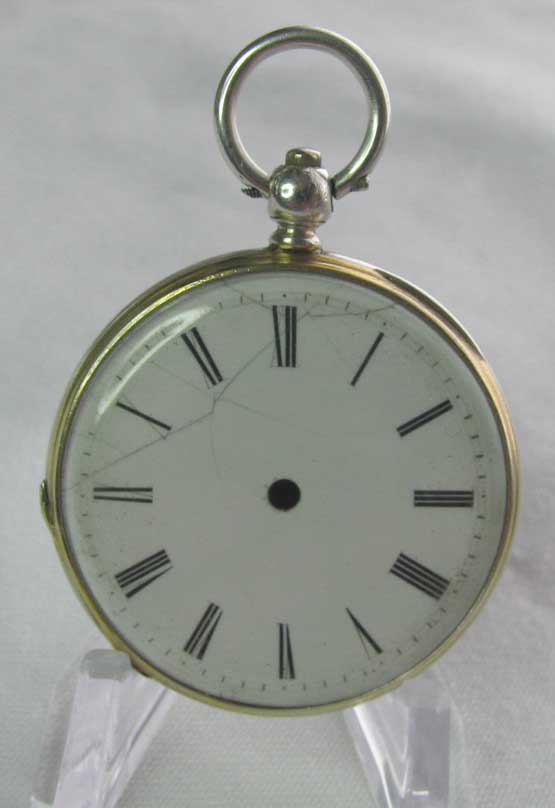 | ||||
|
The tube in the pendant still needs a bit of a tweak, but quite an easy fix after getting all that plug out of the way. The nail catch was also kept silver which addeda bit of trickyness to the job, but that came out well too. The pendant still has quite a few 'battle scars' on it, but they've been left as evidence of it's past life. The job was intended to be a 'Resurection' rather than a 'Restoration', think it came off reasonably well. John 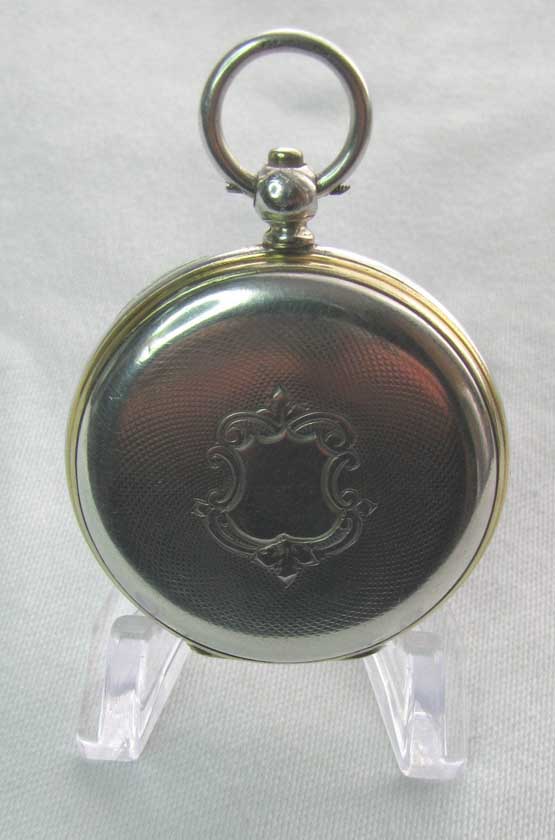 | ||||
|
The inner dome was very badly worn and tarnished, which was a bit of a challenge to tidy up. This was cleaned off and given a wash in Sterling Silver, same cyanide based treatment. John 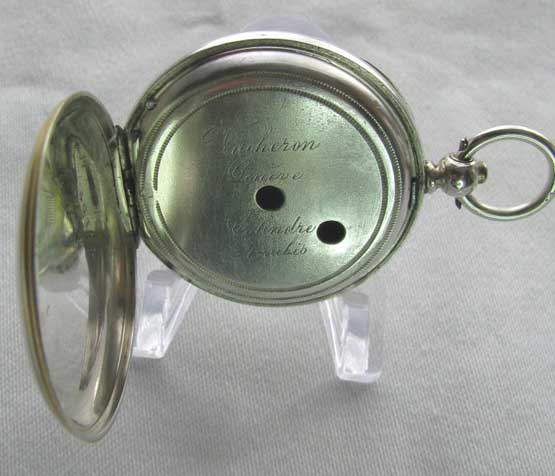 | ||||
|
The crystal turned out to be tricky too, as the rim is very shallow on the bezel, I actually broke 3x trialling different dome sizes, but the one it ended up with looks good, it's also Very thin! John 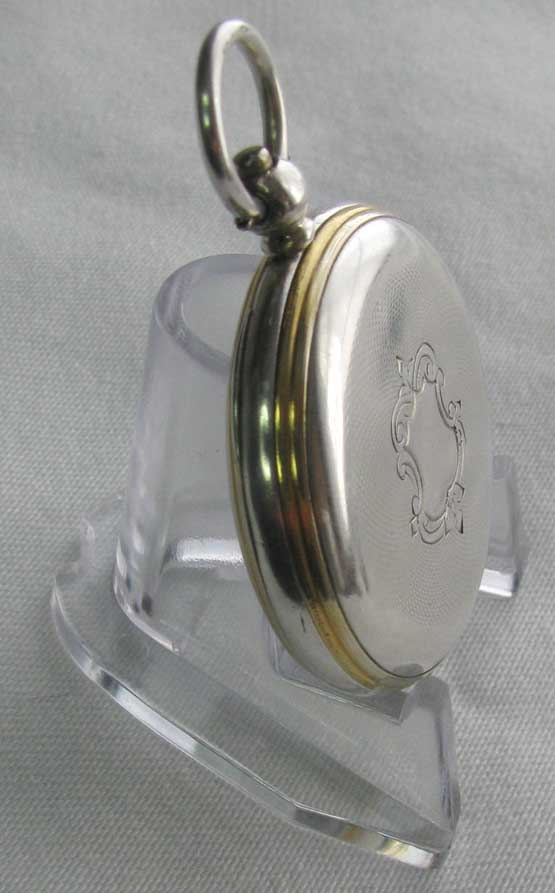 | ||||
|
Another side shot! John 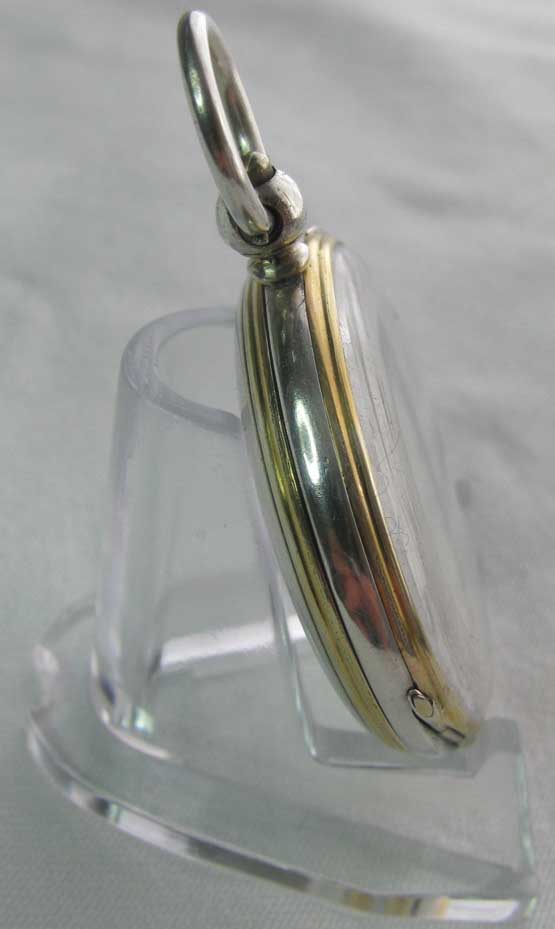 | ||||
|
| IHC Life Member Site Moderator |
Fantastic Job John! Thanks for the posts and details you post, I always learn something new reading your posts. I have always been interested in one of those plating machines. I have experimented with a small one but it never had enough juice to do a great job. We use to use basically the reverse procedure for restoring ground off serial numbers on firearms & automobile VIN numbers. Tom | |||
|
That's about it for the case, just need to sort out the 'old movement' shots and get those posted, now they Really Are an eye opener! John | ||||
|
Hey thanks Tom, think we 'crossed in the post' I had the main tank made for me about 7 years ago, but I've never used that one in anger yet, I've nowhere to use it where I can rig up an extractor. It's not the sort of gear to use in the house. It got a bit of a pain lugging it all out just to use the pen though, and one day I just lucked on a small recitfier on eBay which does exactly the same job - ideal for the pen. Rheostat and gauges for variable volts and amps, and has the same sockets for the pen. Paid a pittance for it too because I don't think anyone realised what it was for. I'll put a shot of it up sometime. John | ||||
|
| IHC Life Member Site Moderator |
Thanks John, when you get a chance I would like to see it. I tried to wait until you were done posting so I would post comments in the middle of yours but as usual I was wrong. Tom | |||
|
John: Great photos and great explaination. I'm not sure I can wait to actually see it. but, take your time. I don't want to rush you. I think my Grandmother would be proud. Ernie | ||||
|
Consider it done Tom, just need to haul the thing out of storage. No worries about posting between my offerings, my fault anyway really, I would have got them on faster, but I made a hash of a photo, forgot to reduce it Thanks Ernie, I too hope your Grandmother would be proud of it, although with the movement, I could do with a bit of divine intervention if she could put a word in for me John | ||||
|
John, In addition to praying for you everyday I will include a prayer for wisdom on getting Grandmothers watch running. Ernie | ||||
|
Thank you Ernie, you're a Gentleman I'm probably a lost cause when it comes to 'Wisdom' though, but any help guiding my pinkies onto some bits that will fit would be a Godsend. The donor that you sent over would have fitted great with some slight 'fettling', but when I checked the causes for it not running, found it was pretty much in the state of the original movement - just less ugly! Essentially, the mainspring had broken, and the torque reaction caused when it broke, sent a shockwave down the train big enough to break the escape wheel cock in two. An escape wheel tooth inside the cylinder during the mayhem may also have bent the cylinder which is causing the balance rim to wobble. I'll be able to tell better when I've had the microscope on it, as it Could just be a bent rim, but I doubt it. This pretty much echoes the condition of the original. I've dug out a few other movements which will run, but they have lost parts such as the motionwork etc. In the meantime, I'm still progressing with the original movement. John | ||||
|
What the movement looked like out of the case! John 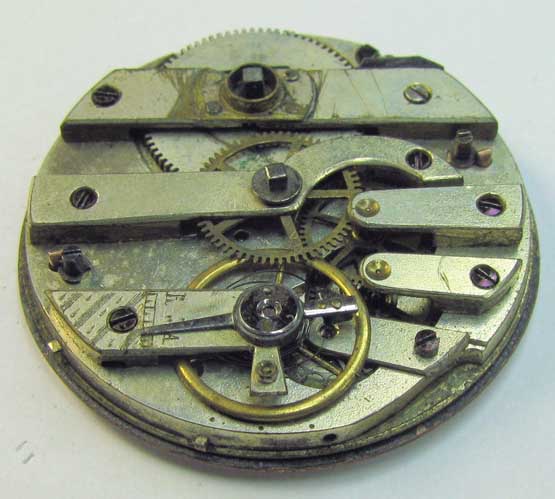 | ||||
|
And turned around! John 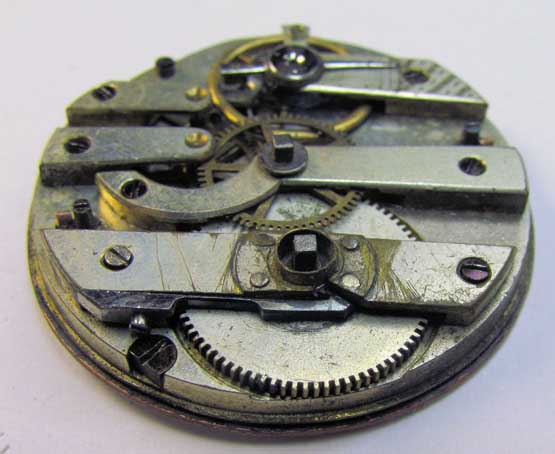 | ||||
|
Whatever anyone thinks of the 'repairs' shown in the following photo's, whomever did the jobs must have had a will of iron and deserved of a medal just to have kept going with this sorry mess. Close up of One of the 'bad bits'! Generally this is one area on Swiss cylinder movements of this type, that Causes a Lot of Grief! The Whole barrel rotates in a single pivot hole that's formed in the bridge of around 0.5mm thick. This takes not only the winding forces of someone heaving on a key, but also bears All the brunt of the torque reaction of the fully wound spring shoving the barrel against the centre wheel pinion! I thought (Hoped) the rounded heads were strangely modified screw heads ....... who's a little optimist Actually ............ they were Rivets, holding on the Soldered dust cap! John 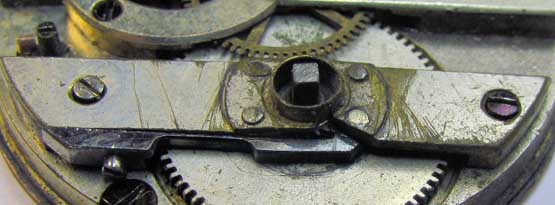 | ||||
|
| Powered by Social Strata | Page 1 2 3 |
| Your request is being processed... |
|
Welcome Aboard IHC185™  Internet Horology Club 185
  IHC185™ Discussion Site Main Page
  Horological Discussions, Questions and Answers
  European Pocket Watch Forum
  Help Id my Great Great Grandmothers watch-Swiss?
 Internet Horology Club 185
  IHC185™ Discussion Site Main Page
  Horological Discussions, Questions and Answers
  European Pocket Watch Forum
  Help Id my Great Great Grandmothers watch-Swiss?
©2002-2025 Internet Horology Club 185™ - Lindell V. Riddle President - All Rights Reserved Worldwide

